How to make a gusset
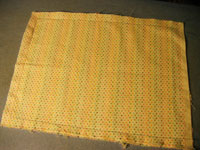
Figure 1
Making a gusset is what gives the bottom of a bag that squared look. You can make them in various sizes, depending on how big your bag is. A two-inch gusset is pretty standard.
1. With right sides together, pin bag front to bag back. Stitch sides and bottom together, pivoting at bottom corners. Don’t turn yet. (Figure 1)
2. Put your hand inside of the bag, and fold the corner where the bottom seam and side seam meet into a triangle. Finger press the seams open and fold flat. (Figure 2)
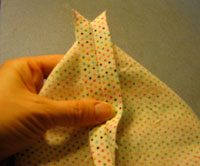
Figure 2
3. Make sure the side seam is lined up with bottom seam (I stick a pin through the middle of the seam in front of me and keep adjusting the fabric behind until the pin comes out right in the middle of the other seam).
4. Measure down two inches (or however big you want your gusset) and pin evenly across. (Figure 3)
5. Stitch all the way across (taking pins out as you stitch), backstitching at edges. (Figure 4)
4. Measure down two inches (or however big you want your gusset) and pin evenly across. (Figure 3)
5. Stitch all the way across (taking pins out as you stitch), backstitching at edges. (Figure 4)
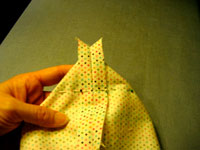 Figure 3 |
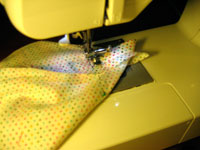 Figure 4 |
6. After you’re sure you’re happy with your gusset, trim away the excess (to avoid bulk in the corners). Repeat at the bag’s other corner. If you’re making a lined bag, you need to make the gusset in the lining in the same way.
